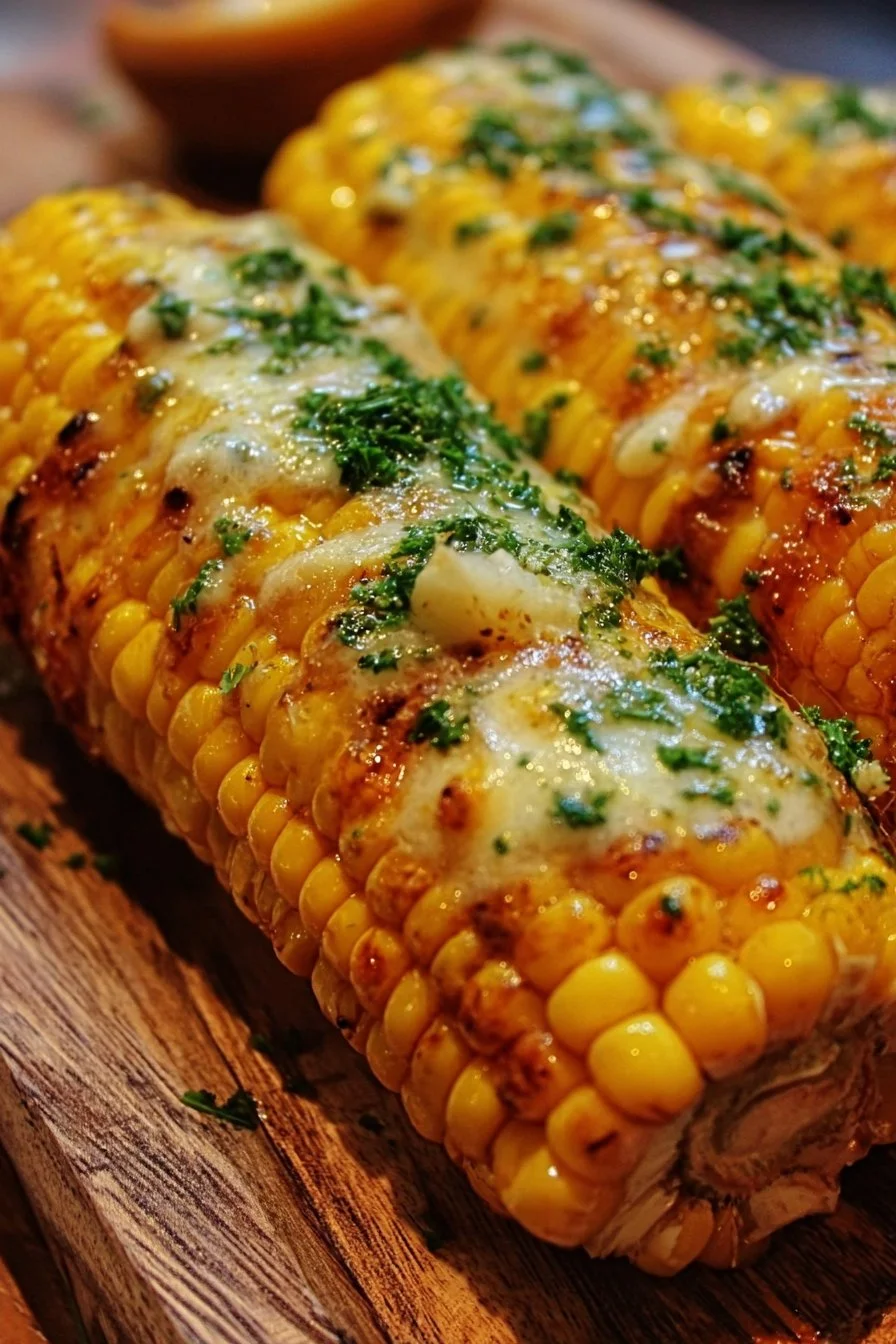
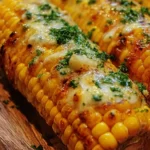
Cheesy Garlic Butter Corn on the Cob
If there’s one thing that epitomizes summer, it’s the sound of corn on the cob sizzling on a grill, and not just any corn, but Cheesy Garlic Butter Corn on the Cob! This dish is a delectable combination of tender corn, creamy butter, and rich cheese, all wrapped in the irresistible aroma of garlic. Imae biting into a juicy ear of corn, where each kernel bursts with flavor and decadence. Is your mouth watering yet?
Did you know that corn has been cultivated for thousands of years and is a staple in many cultures? Cheesy Garlic Butter Corn on the Cob is not just an emblem of summer barbecues but a perfect side dish that brings families together. Whether you’re hosting a weekend cookout or preparing a casual weeknight dinner, this recipe is quick, easy, and utterly satisfying. Plus, if you love sides like Creamy Parmesan Garlic Mashed Potatoes, you’ll definitely want to add this to your culinary repertoire.
So, grab your ears of corn and let’s get started on making something truly special!
What is Cheesy Garlic Butter Corn on the Cob?
What’s in a name, you ask? When it comes to Cheesy Garlic Butter Corn on the Cob, it’s all in the delightful components! The “cheesy” refers to the generous sprinkle of cheese that melts into each bite, and “garlic butter” adds that savory kick that keeps taste buds happy. But why is it called “corn on the cob”? Well, it alludes to that delightful way we serve corn in glorious, juicy segments right off the cob—just begg to be slathered with that heavenly garlic butter.
In the age-old saying, “the way to a man’s heart is through his stomach,” this dish hands down wins the prize for its creamy goodness. So why not bring some love to your dinner table? Dive into this mouthwatering recipe that will have your family asking for seconds!
Why You’ll Love This Cheesy Garlic Butter Corn on the Cob
Prepare to fall head over heels for Cheesy Garlic Butter Corn on the Cob! First and foremost, the star of this dish is undoubtedly the sweet, juicy corn, which becomes even more extravagant when combined with a luscious garlic butter sauce. You can turn a simple ear of corn into a five-star experience right in your kitchen.
Secondly, making this delightful dish at home is a cost-saving win. Instead of buying overpriced skewers at a theme park, you can replicate that experience in your own backyard for a fraction of the price. Lastly, the toppings are where the magic happens. With just a sprinkle of cheese and fresh herbs, you create an explosion of flavor that’ll make your taste buds dance. If you love flavor-packed sides like Grilled Vegetable Skewers, this corn will be your new go-to. So why not gather the family and dive into this adventure of flavor-making?
How to Make Cheesy Garlic Butter Corn on the Cob
Quick Overview
Cheesy Garlic Butter Corn on the Cob is not only easy to prepare, but it’s also a dish that everyone will love. In just about 30 minutes, you’ll have a delicious side ready to go. The standout elements include sweet corn, a rich buttery sauce, and gooey cheese that add a special touch. Sounds appealing, right?
Key Ingredients for Cheesy Garlic Butter Corn on the Cob
Here’s what you’ll need to create this scptious recipe:
- 4 ears of fresh corn, husked
- 4 tablespoons of unsalted butter, melted
- 4 cloves of garlic, minced
- 1 cup of shredded cheese (like cheddar, mozzarella, or a blend)
- Fresh parsley or chives for garnish
- Salt and pepper to taste
Step-by-Step Instructions:
- Preheat Your Grill or Oven: Be by preheating your grill to medium-high heat or set your oven to 400°F (200°C).
- Prepare the Corn: Husk the corn and remove all silk. Rinse them under cold water and pat dry.
- Make the Garlic Butter: In a bowl, mix the melted butter with minced garlic, salt, and pepper.
- Apply the Butter: Brush the garlic butter mixture generously over each ear of corn, ensuring they are well-coated.
- Grill or Bake the Corn:
- For Grilling: Place the corn on the grill and cook for about 10-15 minutes, turning occasionally, until the corn is tender and has a slight char.
- For Baking: Arrange the corn on a baking sheet and roast for approximately 20 minutes, turning halfway through.
- Add the Cheese: Once the corn is cooked, remove it from the grill or oven. While it’s still hot, sprinkle the shredded cheese over the corn, allowing it to melt.
- Garnish and Serve: Finish with freshly chopped parsley or chives before serving. Enjoy!
What to Serve Cheesy Garlic Butter Corn on the Cob With
To elevate your meal, consider serving Cheesy Garlic Butter Corn on the Cob with a variety of dishes. Grilled chicken or ribs make for a classic pairing that balances beautifully with the sweet corn. Alternatively, a light summer salad or roasted vegetables can provide a fresh contrast. And don’t forget the drinks! A chilled glass of lemonade or iced tea will keep the summer vibes flowing.
Top Tips for Perfecting Cheesy Garlic Butter Corn on the Cob
- Fresh Corn is Key: Use the freshest corn you can find for the best flavor. Look for bright green husks and plump kernels.
- Adjust the Garlic: If you’re a garlic lover, feel free to add extra minced garlic or even a garlic powder sprinkle.
- Cheese Choices: Get creative with your cheese selection! Try pepper jack for a spicy kick or feta for a tangy twist.
- Don’t Overcook: Keep an eye on the cooking time to avoid mushy corn. The kernels should remain crisp but tender.
Storing and Reheating Tips
Leftover Cheesy Garlic Butter Corn on the Cob can be stored in an airtight container in the fridge for up to three days. If you want to save it for later, consider freezing the cooked corn on the cob. Just wrap each ear tightly in aluminum foil or freezer-safe bags, and they can last up to three months in the freezer.
When you’re ready to enjoy your leftovers, simply reheat in the oven at 350°F (175°C) for about 10-15 minutes, or until heated through. You can even pop it in the microwave for a faster option, though you might lose some of that delicious grilled flavor!
Now that you’ve discovered the magic of Cheesy Garlic Butter Corn on the Cob, it’s time to gather the ingredients and indulge in this delightful dish. Not only will your family love it, but you’ll also have a new summer staple that’s bound to impress. Enjoy your cooking adventure!
Cheesy Garlic Butter Corn on the Cob
Ingredients
Method
- Preheat your grill to medium-high heat or set your oven to 400°F (200°C).
- Husk the corn and remove all silk. Rinse them under cold water and pat dry.
- In a bowl, mix the melted butter with minced garlic, salt, and pepper.
- Brush the garlic butter mixture generously over each ear of corn, ensuring they are well-coated.
- Place the corn on the grill and cook for about 10-15 minutes, turning occasionally, until the corn is tender and has a slight char.
- Alternatively, arrange the corn on a baking sheet and roast for approximately 20 minutes, turning halfway through.
- Once the corn is cooked, remove it from the grill or oven. While it’s still hot, sprinkle the shredded cheese over the corn, allowing it to melt.
- Finish with freshly chopped parsley or chives before serving. Enjoy!