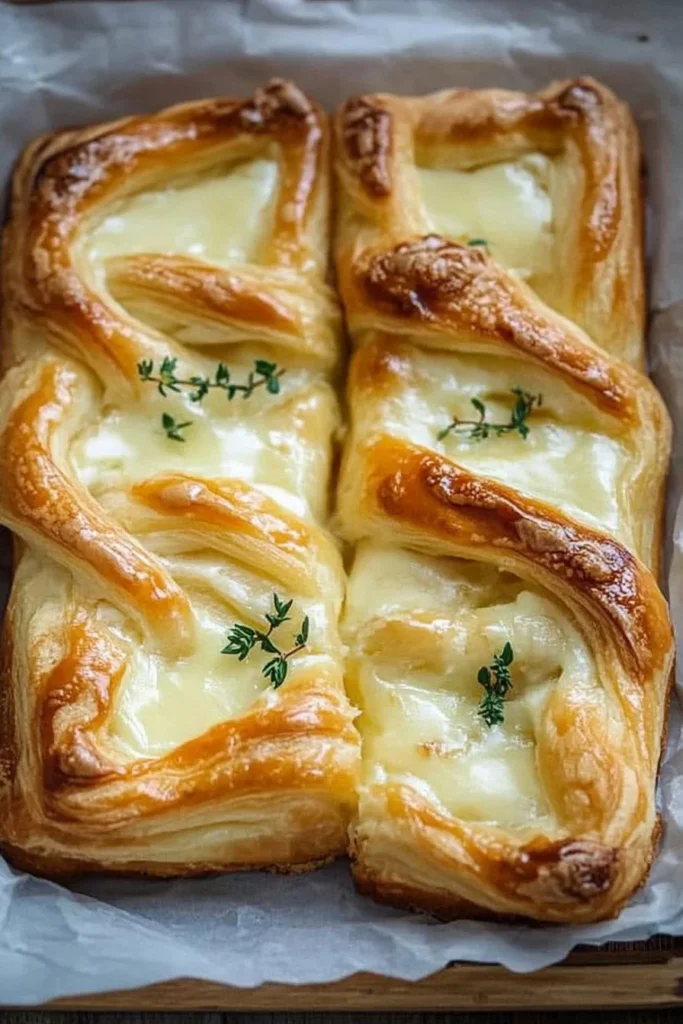
Easy Cheese Danish: A Delightful Pastry Experience
If you’ve ever sunk your teeth into a warm, flaky cheese danish, you know that first bite brings a world of flavor. It’s creamy, sweet, and oh-so delectable! Imae waking up to the heavenly aroma of freshly baked pastries wafting through your kitchen, enticing everyone to gather around the table. The best part? This Easy Cheese Danish recipe is not only quick to prepare but also perfect for the entire family to enjoy!
Did you know that the first Danish pastries were said to be inspired by Austrian bakers in the 1800s? They brought their fascinating pastry techniques to Denmark, where locals added a twist, creating the beloved cheese danish we know today. With its buttery, flaky layers and creamy cheese filling, this treat will surely charm your taste buds. If you love easy-to-make delights similar to our popular “Classic Chocolate Chip Cookies,” then this recipe is right up your alley! Get ready to impress your family and friends with a delightful pastry that’s simple to whip up and guaranteed to satisfy.
What is Easy Cheese Danish?
So, what exactly is this deliciously decadent dish we’re talking about? Well, the Cheese Danish is a flaky pastry filled with sweet cream cheese and can be topped with various fruits or drizzled with icing. But isn’t it funny how such a delightful pastry gets its name? You might think it involves some elaborate backstory, but in reality, the term “danish” comes from the style of pastry-making brought to life in Denmark. Kind of like how “the way to a man’s heart is through his stomach,” it seems the way to our hearts is through this scptious treat! The real question is, are you ready to try making your very own Easy Cheese Danish?
Why You’ll Love This Easy Cheese Danish
There are countless reasons to adore this Easy Cheese Danish, but let’s break it down into three main highlights: its delightful taste, cost-saving benefits, and customizable nature!
First, let’s talk about taste. The combination of flaky pastry and the smooth, sweet cream cheese filling creates a mouth-watering sensation that will keep you coming back for more. You won’t even need to visit a bakery to satisfy your cravings!
Next, think of the savings. Why spend a small fortune on store-bought pastries when you can create a similar (if not better) version at home for a fraction of the cost? Making these danishes not only saves you money but also allows you to whip up a fresh batch whenever the mood strikes!
Lastly, the customizable options allow you to get creative in the kitchen! Whether you want to add fresh fruit, a touch of lemon zest, or a playful drizzle of icing, this Easy Cheese Danish can be tailored to suit your taste preferences. Comparatively, you might enjoy making our “Fruit Tart,” but there’s something uniquely satisfying about crafting a danish from scratch. So, dust off those aprons, and let’s get started!
How to Make Easy Cheese Danish
Quick Overview
Making this Easy Cheese Danish is a breeze! With its simple ingredients and straightforward steps, you’ll have delicious pastries ready to impress anyone in just about 30 minutes. Whether you’re hosting brunch or simply treating yourself, this recipe delivers satisfaction without the hassle.
Key Ingredients for Easy Cheese Danish
To make these delightful pastries, you’ll need the following ingredients:
- 1 package of pre-made puff pastry
- 8 oz cream cheese, softened
- 1/3 cup powdered sugar
- 1 tsp vanilla extract
- 1 egg (for egg wash)
- Optional toppings: fresh fruit, icing, or fruit preserves
Step-by-Step Instructions
- Preheat the Oven: Start off by preheating your oven to 400°F (200°C). This ensures even baking for those golden, flaky layers.
- Prepare Puff Pastry: Take your pre-made puff pastry out of the fridge and let it thaw according to the package instructions. Once thawed, roll it out on a lightly floured surface to 1/8-inch thickness.
- Cut the Pastry: Use a sharp knife or pizza cutter to slice the pastry into squares or rectangles (approximately 3×3 inches).
- Make the Filling: In a mixing bowl, combine soft cream cheese, powdered sugar, and vanilla extract. Blend them until smooth and creamy.
- Fill the Pastry: Place a generous spoonful of the cream cheese mixture in the center of each pastry square, being careful not to overfill.
- Fold and Seal: Fold the corners of the pastry over the filling, pinching them together to seal. Brush the tops with a beaten egg for an egg wash.
- Bake: Place the sealed pastries on a parchment-lined baking sheet and bake in the preheated oven for about 15-20 minutes or until golden brown.
- Cool and Enjoy: Allow the pastries to cool slightly before serving. If desired, top them with fresh fruits, icing, or fruit preserves for that extra burst of flavor!
What to Serve Easy Cheese Danish With
Pair your Easy Cheese Danish with a steaming cup of coffee or a refreshing glass of orange juice for a delightful breakfast. Alternatively, consider serving alongside some fresh fruit or a light salad as part of a brunch spread. These perfect pastries also make a lovely treat for a mid-afternoon snack when paired with tea or hot chocolate!
Top Tips for Perfecting Easy Cheese Danish
To ensure your Cheese Danish turns out perfectly delicious, here are some handy tips:
- Use chilled puff pastry: For the flakiest results, keep the pastry chilled until you’re ready to work with it, as warmth can cause it to become sticky.
- Experiment with fillings: Don’t hesitate to get creative! Experimenting with different flavors like lemon or almond extracts can offer a delightful twist.
- Watch the baking time carefully: Ovens can vary, so keep a close eye on the pastries while they bake to achieve that perfect golden color.
Storing and Reheating Tips
If you’d like to save some for later (although we doubt they’ll last long), store any leftovers in an airtight container in the refrigerator for up to three days. To reheat, simply pop them in the oven at 350°F (175°C) for about 5-10 minutes until warmed through. If you want to freeze them, make sure they’re fully cooled, then wrap them tightly in plastic wrap and store in the freezer for up to a month. Just remember, fresh is always best!
Now that you’ve got the scoop on how to create your very own Easy Cheese Danish, what are you waiting for? Dive into this delightful baking adventure and impress yourself and your loved ones with freshly made pastries straight from your kitchen. Happy baking!