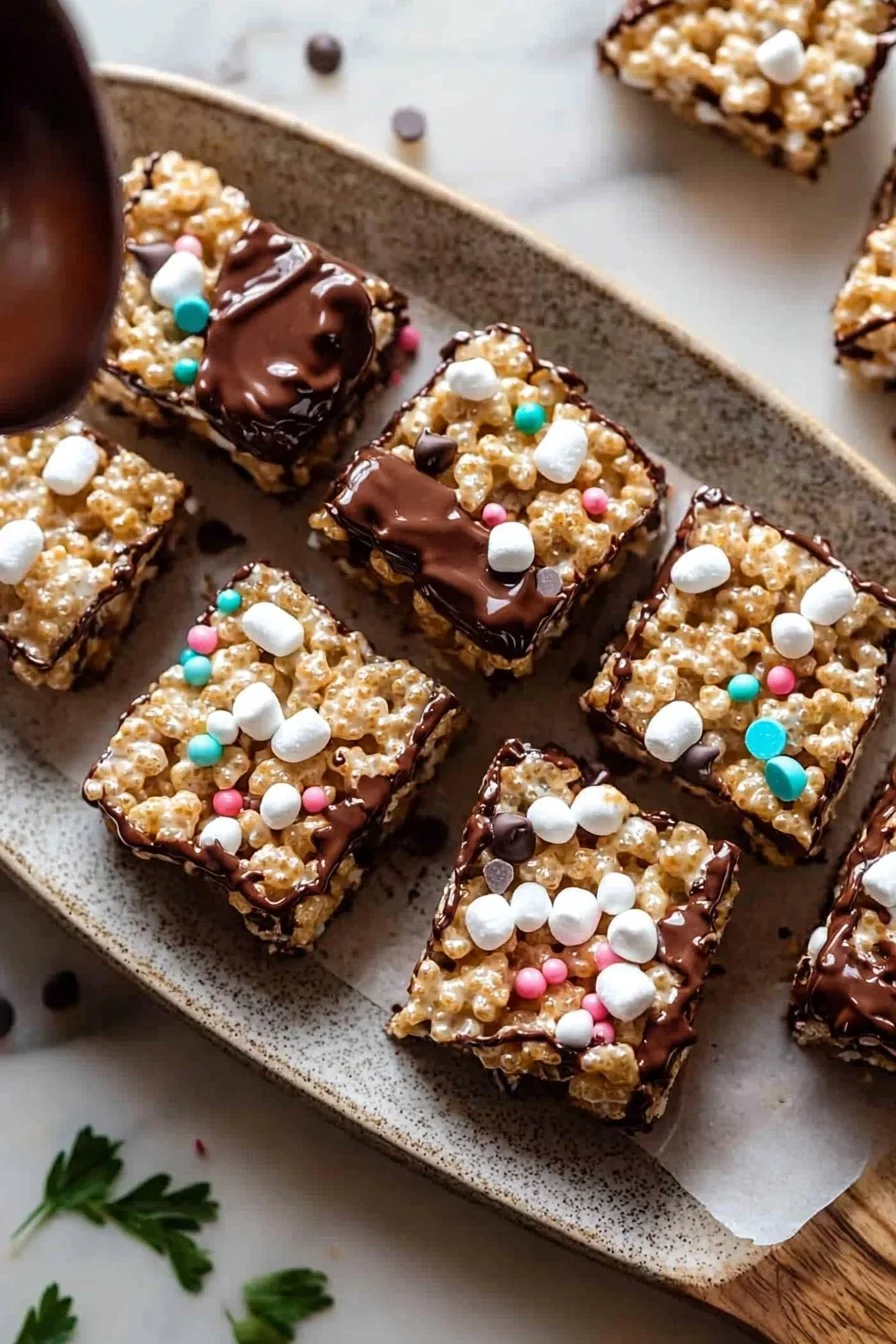
No Bake Chocolate Dipped Rice Krispy Treats
There’s something undeniably irresistible about the combination of crispy, chewy, and gooey textures found in our No Bake Chocolate Dipped Rice Krispy Treats. Imagine taking a bite and feeling that satisfying crunch, followed by a burst of gooey marshmallow goodness, all perfectly complemented by a rich chocolate coating. These treats are perfect for family gatherings or cozy winter evenings.
Did you know? Rice Krispy Treats were first introduced during the 1930s, and they have remained a beloved snack ever since. My own childhood memories are filled with moments spent in the kitchen, working alongside my family to whip up these delectable delights. They remind me of another nostalgic favorite, homemade cookies, but they are even simpler to make!
So if you’re looking for a sweet treat that’s simple to prepare and fills hearts (and stomachs) with joy, you’ve found the right recipe. Keep reading to discover how to whip up these amazing No Bake Chocolate Dipped Rice Krispy Treats!
What are No Bake Chocolate Dipped Rice Krispy Treats?
Now you might be wondering about the name of this delightful treat—No Bake Chocolate Dipped Rice Krispy Treats. Does it mean that we can enjoy them without ever turning on the oven? Yes! The secret lies in marshmallows and Rice Krispies, forming a fuzzy logic that makes perfect sense in the sweet world of desserts. As the saying goes, “the way to a man’s heart is through his stomach.” Honestly, these chocolate-dipped beauties are perfect for winning over anyone’s taste buds.
So, grab your family and get ready to dive into a delicious adventure in the kitchen! Once you take just one bite, it’ll be clear why these treats are a household favorite.
Why You’ll Love This No Bake Chocolate Dipped Rice Krispy Treats
First off, let’s talk about what makes the No Bake Chocolate Dipped Rice Krispy Treats stand out. Crisp rice cereal, gooey marshmallows, and a silky smooth chocolate coating make them a triple threat of flavor and texture.
When it comes to cooking at home, you’re also saving a pretty penny! With just a handful of ingredients, you can create a delightful dessert that rivals store-bought options without burning a hole in your wallet. Think of these treats as a budget-friendly oasis in the world of homemade sweets.
Lastly, you can customize the toppings! Want to add a sprinkle of colorful edible confetti or a dash of sea salt? Go for it! These treats have endless possibilities, making them just as fun to create as they are to eat. Don’t miss out; whip up a batch today!
How to Make No Bake Chocolate Dipped Rice Krispy Treats
Quick Overview
Making No Bake Chocolate Dipped Rice Krispy Treats is a breeze! With just a few simple steps, you will have a delightful dessert ready to enjoy. The satisfaction of biting into these crisp yet chewy treats, combined with the rich chocolate on top, is beyond compare. Prep time is just around 15 minutes, so let’s get started!

Ingredients
Here’s what you’ll need to create your own No Bake Chocolate Dipped Rice Krispy Treats:
- 3 tablespoons butter
- 1 package (10 oz) regular marshmallows or 6 cups miniature marshmallows
- 1/2 teaspoon vanilla extract
- 6 cups Rice Krispies cereal
- 1 cup chocolate chips
- Sprinkles (optional)
Step-by-Step Instructions
- Melt the Butter and Marshmallows
In a large saucepan over low heat, melt the 3 tablespoons of butter. Once melted, add the marshmallows and stir continuously until completely melted and smooth. Make sure not to leave them unattended! - Add Vanilla
Once the marshmallows are melted, remove the saucepan from heat. Stir in the 1/2 teaspoon of vanilla extract for added flavor. - Incorporate the Rice Krispies
Gradually add the 6 cups of Rice Krispies cereal into the melted marshmallow mixture. Stir until well combined, ensuring every piece is coated. - Shape the Treats
Using a buttered spatula (or your hands), press the rice mixture evenly into a greased 9×13-inch baking pan. - Melt the Chocolate
In a microwave-safe bowl, melt the 1 cup of chocolate chips in 30-second intervals, stirring between each interval until smooth. - Dip the Treats
Once the Rice Krispy mixture has cooled slightly, turn them out onto a cutting board and cut them into squares. Dip each square half into the melted chocolate, letting excess chocolate drip off. - Add Sprinkles
If using, sprinkle the tops of the chocolate-dipped treats with sprinkles before the chocolate hardens. - Let Cool
Place the dipped treats on a parchment-lined baking sheet to allow the chocolate to set completely.
And there you have it—a no-bake dessert that’s both delightful and simple to prepare!
Top Tips for Perfecting No Bake Chocolate Dipped Rice Krispy Treats
- Substitutions: Want to switch things up? Try using almond butter instead of butter for a nutty flavor, or substitute dairy-free chocolate chips to cater to dietary preferences.
- Perfect Timing: Wait for the treats to cool just slightly before cutting them. This will help them hold their shape better.
- Avoiding Common Mistakes: The mixture can become too sticky if overcooked. Remember to melt the butter and marshmallows over low heat, stirring continuously, and remove from the heat as soon as it’s liquid!
Storing and Reheating Tips
To keep your No Bake Chocolate Dipped Rice Krispy Treats fresh, store them in an airtight container at room temperature for up to 3 days. You can also refrigerate them to extend the shelf life to about a week.
If you want to freeze them, place them in a freezer-safe bag, making sure to seal it well. They can be stored frozen for up to 3 months. When ready to enjoy, simply thaw them at room temperature or in the refrigerator for a few hours, and they will be just as delicious as the day you made them!
Now that you have the ultimate guide for making No Bake Chocolate Dipped Rice Krispy Treats, it’s time to get in the kitchen! With simple ingredients and easy steps, you can enjoy this delightful treat anytime with family and friends. Happy cooking!

No Bake Chocolate Dipped Rice Krispy Treats
Ingredients
Method
- In a large saucepan over low heat, melt the 3 tablespoons of butter. Once melted, add the marshmallows and stir continuously until completely melted and smooth.
- Once the marshmallows are melted, remove the saucepan from heat. Stir in 1/2 teaspoon of vanilla extract for added flavor.
- Gradually add the 6 cups of Rice Krispies cereal into the melted marshmallow mixture. Stir until well combined, ensuring every piece is coated.
- Using a buttered spatula (or your hands), press the rice mixture evenly into a greased 9x13-inch baking pan.
- In a microwave-safe bowl, melt the 1 cup of chocolate chips in 30-second intervals, stirring between each interval until smooth.
- Once the Rice Krispy mixture has cooled slightly, turn them out onto a cutting board and cut them into squares.
- Dip each square half into the melted chocolate, letting excess chocolate drip off.
- If using, sprinkle the tops of the chocolate-dipped treats with sprinkles before the chocolate hardens.
- Place the dipped treats on a parchment-lined baking sheet to allow the chocolate to set completely.