Easy Halloween Dirt Cups | Pumpkin Patch Dessert for Kids
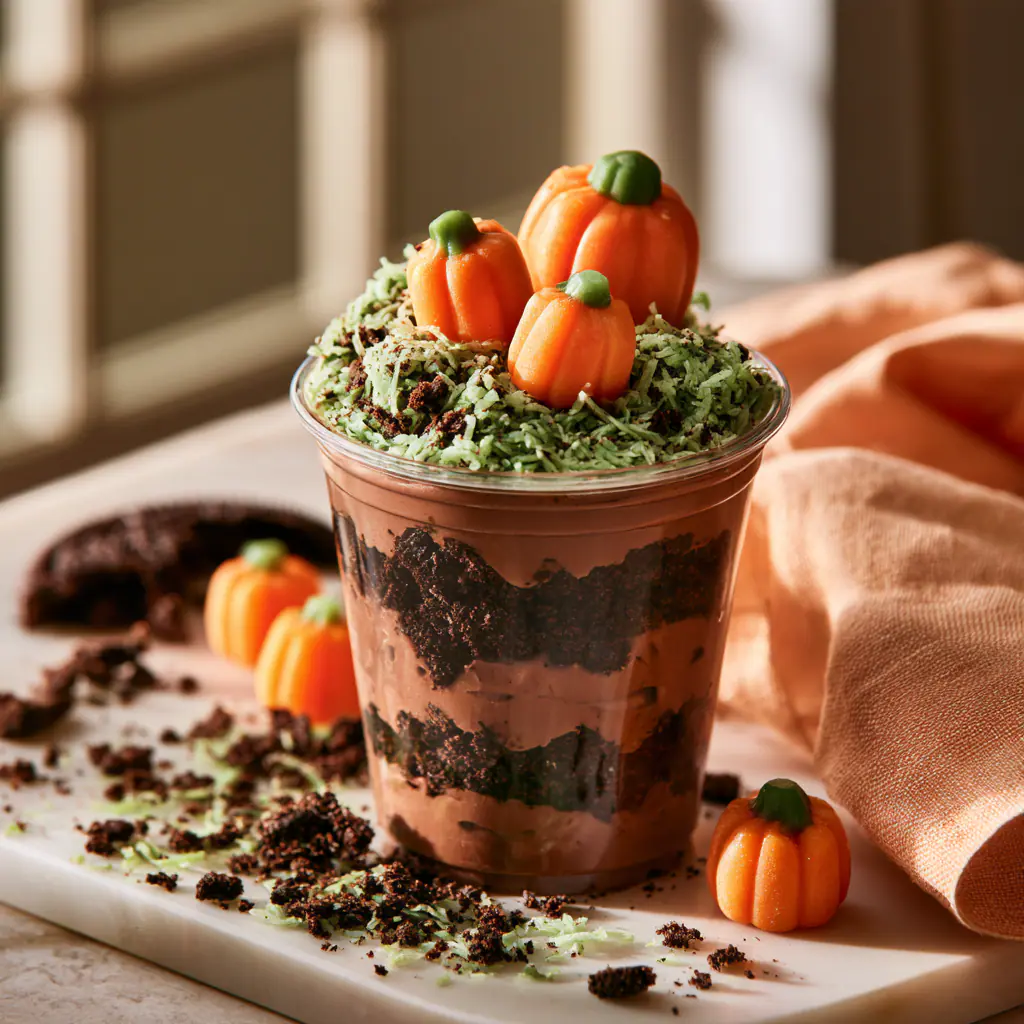
Chocolate sandwich cookies are what turn plain pudding into something that looks like actual garden soil, and picking the right ones matters more than you'd think here. You want the classic dark wafer kind, the kind that crumbles into fine, sandy crumbs instead of clumping into chunks when you pulse it.
For pumpkin patch dirt cups, you'll also need instant chocolate pudding, whipped topping, and candy pumpkins to push into each cup. The whole thing takes about 20 minutes and needs zero oven time, perfect for a Halloween party or a rainy-day kitchen project with the kids.
| Prep | Total | Servings | Difficulty |
|---|---|---|---|
| 20 min | 1 h 20 min | 8 servings | Medium |
About the Main Ingredient
The cookie crumb layer is what sells the whole idea of dirt, so don't rush it. Break the cookies in half, pull out the cream filling if you want a darker, less sweet crumb, then pulse them in a food processor until you get fine, even grains with no big pieces left. If you don't have a processor, a zip-top bag and a rolling pin work just as well; press down and roll firmly until the crumbs look like damp potting soil. Save a few spoonfuls for the top layer so every cup gets that final dusting. The color should be deep brown, almost black, and the texture dry enough to sprinkle, not pasty or stuck together.
The Short Version
- No-bake dessert: everything sets in the fridge, no oven needed.
- Ready in 20 minutes: plus chill time, most of it hands-off.
- One bowl for pudding: minimal cleanup when you're done.
- Kids can build it: layering cups is an easy, hands-on job for small helpers.
- Make-ahead friendly: assemble the night before your Halloween gathering.
Pumpkin Patch Dirt Cups Ingredients
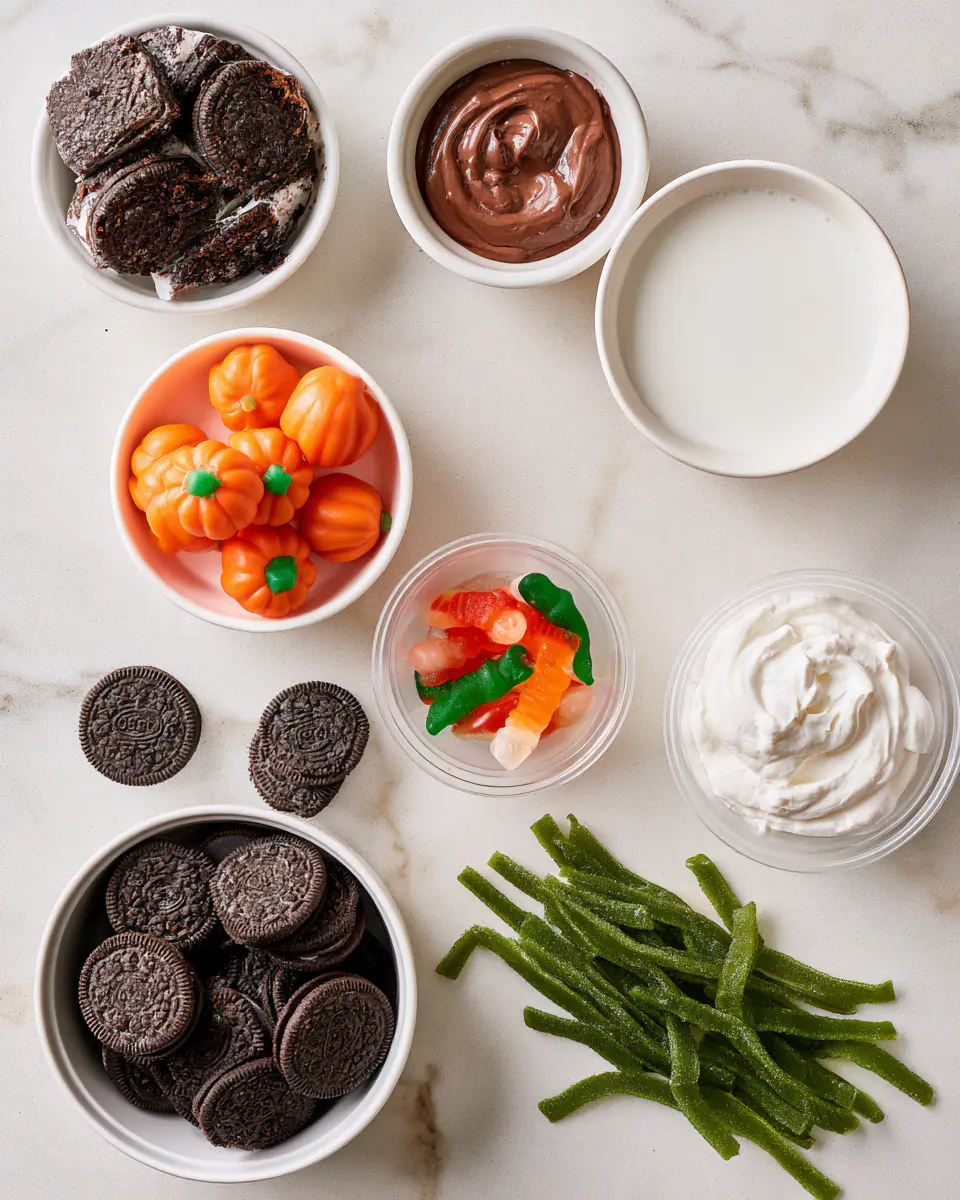
- Chocolate sandwich cookies: the crushed crumbs are the "dirt" and give the cups their color and crunch; any dark chocolate wafer cookie works the same way.
- Instant chocolate pudding mix: sets quickly and gives the cups a thick, spoonable base without baking.
- Whole milk: whisked into the pudding mix for a smooth, rich texture; 2% milk works fine too.
- Whipped topping: folded into the pudding for a lighter, fluffier layer; whipped cream is a good substitute if you'd rather whip your own.
- Candy pumpkins: pressed on top for the pumpkin patch look; orange candy corn works as a stand-in.
- Gummy worms: tucked into the crumbs for a playful touch kids love digging for.
- Clear plastic cups: let the layers show through, which is half the appeal of this dessert.
- Green pull-apart licorice: cut into short pieces for pumpkin "vines," optional but a nice detail.
Find exact amounts in the recipe card below.
Making Pumpkin Patch Dirt Cups, Step by Step
- Crush the cookies. Pulse the sandwich cookies in a food processor until the crumbs are fine and sandy, about 30 seconds; set aside a half cup for topping.
- Whisk the pudding. Combine pudding mix with cold milk and whisk for 2 minutes, until it thickens and coats the back of a spoon.
- Fold in whipped topping. Gently fold the whipped topping into the pudding until no streaks remain and the mixture looks light and airy.
- Layer the cups. Spoon a layer of cookie crumbs into each cup, add a scoop of pudding mixture, then repeat until the cups are nearly full.
- Add the finishing dirt. Sprinkle the reserved crumbs over the top of each cup, patting them down lightly so they look like loose soil.
- Decorate and chill. Press a candy pumpkin and a gummy worm into each cup, then refrigerate for at least 1 hour so the layers set before serving.
Storage and Reheating
These cups keep well in the fridge for up to 3 days, covered with plastic wrap so the crumbs don't dry out. Freezing isn't recommended; the pudding and whipped topping separate and turn watery once thawed. For a party, assemble the cups up to a day ahead and add the candy pumpkins right before serving so they stay crisp instead of softening in the pudding.
What to Serve With It
Set these out alongside Honey Roasted Pumpkin Seeds for a salty contrast, or pair them with Rice Krispie Treat Pumpkins for a table full of pumpkin-shaped sweets. A bowl of Easy Sweet and Salty Snack Mix next to the cups gives guests something crunchy to break up all the chocolate.
Common Questions About Pumpkin Patch Dirt Cups
What cookies work best for the dirt layer?
Chocolate sandwich cookies give the darkest, most convincing crumb, but any plain chocolate wafer cookie crushed fine will do the job.
How far ahead can I make these?
Assemble the cups up to 24 hours before serving and keep them covered in the fridge; add the candy pumpkins just before guests arrive.
Can I use homemade whipped cream instead of whipped topping?
Whipped cream works fine, though it won't hold its shape quite as long, so plan to serve the cups within a few hours of adding it.
Why did my pudding layer turn out runny?
The pudding needs at least 2 minutes of whisking and a short rest in the fridge before layering; skipping that step leaves it too thin to hold its shape.
Pumpkin Patch Dirt Cups
Ingredients
Method
- Crush the cookies: Pulse the chocolate sandwich cookies in a food processor until they form fine, sandy crumbs, about 30 seconds. Set aside about 1/2 cup of crumbs for topping the finished cups.
- Whisk the pudding: In a large bowl, whisk the pudding mix with the cold milk for about 2 minutes, until it thickens enough to coat the back of a spoon. Let it sit in the fridge for 5 minutes to set slightly.
- Fold in whipped topping: Gently fold the whipped topping into the pudding until no white streaks remain and the mixture looks light and fluffy. Avoid overmixing so it stays airy.
- Layer the crumbs and pudding: Spoon a layer of cookie crumbs into the bottom of each clear plastic cup, then add a layer of the pudding mixture. Repeat the layers once more, ending with pudding, until the cups are nearly full.
- Top with reserved crumbs: Sprinkle the reserved cookie crumbs evenly over the top of each cup, patting them down lightly so they resemble loose soil.
- Decorate each cup: Press a candy pumpkin and a gummy worm into the crumb layer of each cup, and tuck in a piece of green licorice as a vine if using.
- Chill before serving: Refrigerate the cups for at least 1 hour so the pudding layers set firm enough to hold their shape when scooped with a spoon.
- Serve: Pull the cups straight from the fridge and serve cold, with a spoon tucked into each one for digging through the layers.
You Might Also Like
- Rice Krispie Treat Pumpkins: Easy Halloween Snack for Kids: a no-bake marshmallow treat shaped like mini pumpkins.
- Spooky Halloween Eyeball Cheese Ball | Easy Party Appetizer: a savory party starter shaped for the holiday table.
- Easy Halloween Ghost Strawberries | Fun Party Snack: a light, fruity snack kids can decorate themselves.
- Easy Sweet and Salty Snack Mix | Movie Night Favorite: a crunchy mix that balances out a sweet dessert table.