Ranch Chicken Enchiladas
Are you in the mood for something creamy, cheesy, and utterly delightful? Look no further! These Ranch Chicken Enchiladas are not only bursting with flavor but also incredibly easy to whip up. Imagine indulging in warm, gooey enchiladas filled with tender, shredded chicken, all coated in a luxurious ranch dressing that elevates every single bite. This recipe is a family favorite that brings everyone together on casual weeknights or cozy family gatherings.
Here’s a fun fact: despite the name, ranch dressing isn’t just for salads! It’s a game-changer in dishes like these enchiladas, adding a hearty creaminess that will keep you coming back for more. If you’ve ever tried the classic chicken enchiladas on my blog, you’ll be amazed at how this ranch-infused twist becomes an instant hit at the dinner table! Let’s get cooking and make some delicious memories!
What are Ranch Chicken Enchiladas?
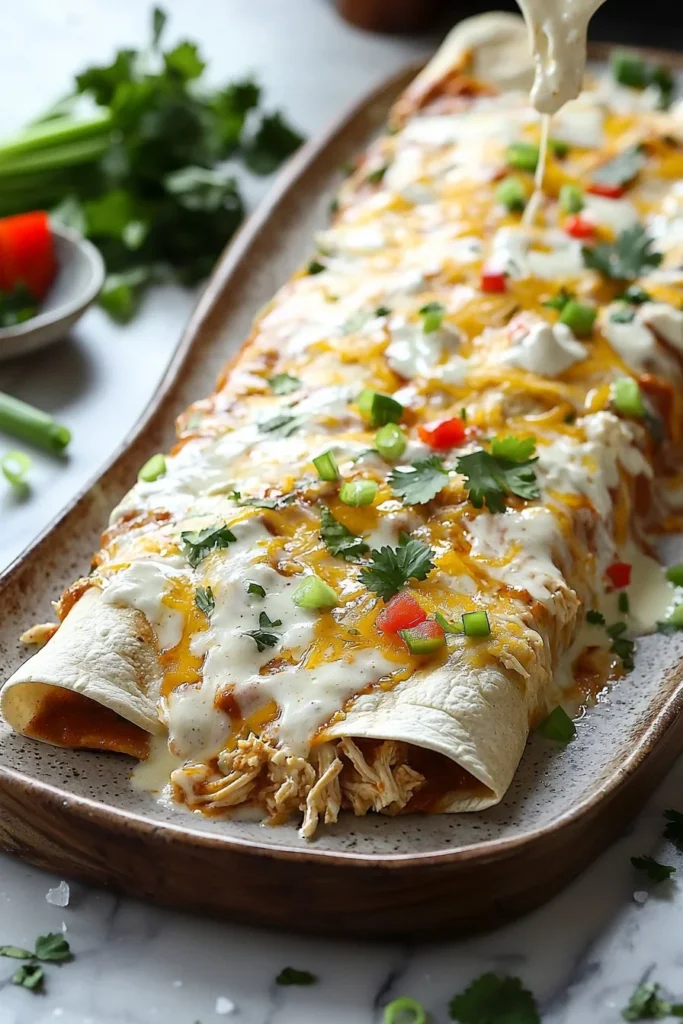
So, what exactly are Ranch Chicken Enchiladas? Great question! Imagine savory tortillas wrapped around shredded chicken that’s doused in ranch dressing and topped with a generous layer of cheese—sounds tempting, right? Why the “ranch”? Perhaps they’re named after the famous salad dressing that adds zest and personality to many dishes. Who knew that something as simple as ranch could steal the show?
Remember, “the way to a man’s heart is through his stomach.” So, whether you’re impressing family or just treating yourself, these enchiladas are sure to do the trick. Don’t miss out on giving this succulent dish a try—your taste buds (and your loved ones) will thank you!
Why You’ll Love This Ranch Chicken Enchiladas
Ranch Chicken Enchiladas are not just a main dish; they are a complete flavor explosion! The blend of textures is divine: a crispy outer layer with a creamy filling that melts in your mouth. Plus, making these delicious enchiladas at home is a perfect option for the budget-conscious chef. You control the ingredients, and there’s something so rewarding about creating a meal from scratch!
What’s more, you can load up on flavorful toppings! Think fresh chopped cilantro, tangy salsa, or zesty jalapeños—each addition brings another layer of taste that takes the enchiladas to the next level. If you’ve enjoyed my other enchilada recipes, you’ll appreciate how this ranch twist makes them feel entirely unique. Don’t wait—let’s dive into making these ranch-infused delights!
How to Make Ranch Chicken Enchiladas
Quick Overview
Making Ranch Chicken Enchiladas is as easy as pie—less than 30 minutes of prep and cooking! You’ll love the combination of tender chicken, creamy ranch, and melted cheese all nestled in soft tortillas. The result is a dish that’s not just satisfying but downright enjoyable. So, put on your apron and grab your ingredients!

Ingredients for Ranch Chicken Enchiladas
- 2 cups cooked chicken, shredded
- 1 cup ranch dressing
- 1 cup shredded cheese (cheddar or Mexican blend)
- 8 flour tortillas
- 1 can (10 oz) enchilada sauce
- 1/2 cup chopped green onions
- 1/2 cup diced peppers (optional)
Step-by-Step Instructions
- Preheat the Oven: Start by preheating your oven to 350°F (175°C). This ensures that your enchiladas bake beautifully.
- Prepare the Chicken Filling: In a large bowl, combine the shredded chicken with ranch dressing and half of the shredded cheese. Add in chopped green onions and the diced peppers if you’re using them.
- Fill the Tortillas: Take a tortilla, scoop some of the chicken mixture into the center, and roll it up tightly. Place the rolled tortilla seam side down in a greased baking dish. Repeat until all tortillas are filled.
- Add the Sauce and Cheese: Pour the enchilada sauce evenly over the tortillas, making sure to cover them completely. Sprinkle the remaining cheese on top.
- Bake: Place the baking dish in the preheated oven and bake for about 20 minutes, or until the cheese is melted and bubbly. The edges should have a golden color.
- Serve: Remove from the oven, let it cool for a few minutes, and garnish with more green onions if you wish. Serve it with your favorite toppings for extra flavor!
Top Tips for Perfecting Ranch Chicken Enchiladas
- Substitutions: If you’re looking for a different flavor profile, try substituting ranch dressing with other sauces such as BBQ sauce for a sweet twist or buffalo sauce for a kick of heat. Just ensure they are halal-compliant!
- Timing: To save time, use rotisserie chicken or pre-cooked chicken. This not only speeds up preparation but also enhances the flavor.
- Common Mistakes: One mistake to avoid is overfilling the tortillas. This can lead to tears and spills during the baking process. A moderate amount will keep them intact and create a perfect presentation!
Storing and Reheating Tips
Leftover Ranch Chicken Enchiladas can be a lifesaver for busy weeknights! Store them in an airtight container in the refrigerator, and they will last for about 3-4 days. If you want to keep them longer, you can freeze the assembled enchiladas (before baking) for up to two months. When you’re ready to enjoy them, simply thaw in the refrigerator overnight, pour on the enchilada sauce, sprinkle cheese, and bake as instructed.
To reheat leftovers, preheat the oven to 350°F (175°C) and cover the dish with aluminum foil. Reheat for about 20-25 minutes or until heated throughout to preserve the flavors and textures of the original dish.
Enjoy making these Ranch Chicken Enchiladas for your family! They’re sure to become a staple in your home. Happy cooking!
Ranch Chicken Enchiladas
Ingredients
Method
- Preheat your oven to 350°F (175°C).
- In a large bowl, combine the shredded chicken with ranch dressing and half of the shredded cheese. Add chopped green onions and diced peppers if using.
- Scoop some of the chicken mixture into a tortilla, roll it up tightly, and place it seam side down in a greased baking dish. Repeat until all tortillas are filled.
- Pour the enchilada sauce evenly over the tortillas and sprinkle the remaining cheese on top.
- Bake for about 20 minutes, or until the cheese is melted and bubbly, with golden edges.
- Remove from oven, let it cool for a few minutes, and garnish with more green onions if desired. Serve with your favorite toppings.